Claude API의 Request는 크게 4가지 분류를 가지고 있다.
- System Messages
- Messages
- Tools
- Model & Config
각각은 다음과 같은 역할을 한다.
System Messages
System Messages는 Claude에게 역할, 성격, 제약사항 등을 지시하는 최상위 설정이다. 배열 형태로 여러 개의 시스템 메시지를 전달할 수 있다.
"system": [
  {
    "type": "text",
    "text": "You are Claude Code, Anthropic's official CLI for Claude.",
    "cache_control": {
      "type": "ephemeral"
    }
  },
  {
    "type": "text",
    "text": "You are an interactive CLI tool that helps users with software engineering tasks...",
    "cache_control": {
      "type": "ephemeral"
    }
  }
]
System Messages에는 다음과 같은 내용이 포함된다:
- Claude의 페르소나 및 역할 정의
- 보안 및 윤리 가이드라인
- 응답 형식 및 톤 설정
- 프로젝트 정보 등 컨텍스트
cache_control을 통한 캐싱 설정
Messages
Messages는 user와 assistant 역할이 번갈아가며 주고받은 대화를 누적하는 배열이다. assistant 메시지는 반드시 모델의 실제 응답일 필요가 없다. 이를 활요해 API 호출 시 assistant 메시지를 미리 작성해서 전달하면, Claude는 그 내용 이후부터 이어서 응답한다. 이를 Prefill 기법이라 한다.
이 대화 기록을 통해 Claude는 맥락을 유지하며 응답한다.
"messages": [
  {
    "role": "user",
    "content": [...]
  },
  {
    "role": "assistant",
    "content": [...]
  },
  {
    "role": "user",
    "content": [...]
  }
]
User Message
User의 content는 주로 두 가지 type으로 구성된다:
1. text - 사용자의 일반 메시지나 시스템 리마인더
{
  "role": "user",
  "content": [
    {
      "type": "text",
      "text": "선물을 주고받는 기능을 위한 entity를 설계하라."
    }
  ]
}
2. tool_result - Tool 실행 결과 반환
{
  "role": "user",
  "content": [
    {
      "tool_use_id": "toolu_01Qj7gnFLKWBNjg",
      "type": "tool_result",
      "content": [
        {
          "type": "text",
          "text": "## Entity 구조 탐색 보고서\n\n철저한 탐색을 통해..."
        }
      ]
    }
  ]
}
Assistant Message
Assistant의 content는 주로 세 가지 type으로 구성된다:
1. text - Claude의 응답 메시지
{
  "type": "text",
  "text": "선물 주고받기 기능을 위한 entity 설계를 시작하겠습니다."
}
2. thinking - Extended Thinking 기능 활성화 시 사고 과정 (signature로 검증)
{
  "type": "thinking",
  "thinking": "사용자가 선물을 주고받는 기능을 위한 entity 설계를 요청했습니다...",
  "signature": "EqskYIChgCKknyFYp5cu1zhVOp7kFTJb..."
}
3. tool_use - Tool 호출 요청
{
  "type": "tool_use",
  "id": "toolu_01Qj7gn6vLKCNjg",
  "name": "Task",
  "input": {
    "subagent_type": "Explore",
    "prompt": "이 NestJS TypeScript 프로젝트에서 entity 구조를 탐색해주세요...",
    "description": "Entity 구조 탐색"
  }
}
User와 Assistant의 협력
Tool 사용 흐름은 다음과 같이 진행된다:
- Assistant:
tool_use로 Tool 호출 요청
- User:
tool_result로 실행 결과 반환
- Assistant: 결과를 바탕으로
text 응답 또는 추가 tool_use
이 과정에서 어떤 Tool을 사용할 수 있는지는 tools 배열이 정의한다.
Tools는 Claude가 사용할 수 있는 도구들을 정의하는 배열이다. 각 Tool은 name, description, input_schema 세 가지 필드로 구성된다.
"tools": [
  {
    "name": "ToolName",
    "description": "Tool에 대한 설명...",
    "input_schema": {
      "type": "object",
      "properties": {...},
      "required": [...],
      "additionalProperties": false,
      "$schema": "http://json-schema.org/draft-07/schema#"
    }
  }
]
| 필드 |
설명 |
name |
Tool의 고유 식별자. Claude가 tool_use에서 이 이름으로 호출 |
description |
Tool의 용도, 사용법, 주의사항 등을 상세히 기술. Claude가 어떤 Tool을 선택할지 판단하는 근거 |
input_schema |
JSON Schema 형식으로 입력 파라미터 정의 |
input_schema는 JSON Schema draft-07 스펙을 따르며, Tool 호출 시 필요한 파라미터를 정의한다.
"input_schema": {
  "type": "object",
  "properties": {
    "pattern": {
      "type": "string",
      "description": "The regular expression pattern to search for"
    },
    "path": {
      "type": "string",
      "description": "File or directory to search in. Defaults to current working directory."
    },
    "output_mode": {
      "type": "string",
      "enum": ["content", "files_with_matches", "count"],
      "description": "Output mode: 'content' shows matching lines, 'files_with_matches' shows file paths..."
    },
    "-i": {
      "type": "boolean",
      "description": "Case insensitive search"
    },
    "head_limit": {
      "type": "number",
      "description": "Limit output to first N lines/entries"
    }
  },
  "required": ["pattern"],
  "additionalProperties": false,
  "$schema": "http://json-schema.org/draft-07/schema#"
}
properties 내 각 파라미터 정의
각 파라미터는 다음 필드들로 정의된다:
| 필드 |
설명 |
type |
데이터 타입 (string, number, boolean, array, object 등) |
description |
파라미터의 용도와 사용법 설명 |
enum |
(선택) 허용되는 값의 목록. 이 중 하나만 선택 가능 |
default |
(선택) 기본값 |
| 필드 |
설명 |
type |
항상 "object" |
properties |
파라미터 정의 객체 |
required |
필수 파라미터 이름 배열. 여기 포함되지 않은 파라미터는 선택적 |
additionalProperties |
false면 정의되지 않은 파라미터 전달 불가 |
$schema |
JSON Schema 버전 명시 |
{
  "name": "Grep",
  "description": "A powerful search tool built on ripgrep\n\n  Usage:\n  - ALWAYS use Grep for search tasks...",
  "input_schema": {
    "type": "object",
    "properties": {
      "pattern": {
        "type": "string",
        "description": "The regular expression pattern to search for in file contents"
      },
      "path": {
        "type": "string",
        "description": "File or directory to search in (rg PATH). Defaults to current working directory."
      },
      "glob": {
        "type": "string",
        "description": "Glob pattern to filter files (e.g. \"*.js\", \"*.{ts,tsx}\")"
      },
      "output_mode": {
        "type": "string",
        "enum": ["content", "files_with_matches", "count"],
        "description": "Output mode. Defaults to 'files_with_matches'."
      },
      "-A": {
        "type": "number",
        "description": "Number of lines to show after each match"
      },
      "-B": {
        "type": "number",
        "description": "Number of lines to show before each match"
      },
      "-i": {
        "type": "boolean",
        "description": "Case insensitive search"
      },
      "multiline": {
        "type": "boolean",
        "description": "Enable multiline mode. Default: false."
      }
    },
    "required": ["pattern"],
    "additionalProperties": false,
    "$schema": "http://json-schema.org/draft-07/schema#"
  }
}
이 Tool을 Claude가 호출할 때의 tool_use:
{
  "type": "tool_use",
  "id": "toolu_01ABC123",
  "name": "Grep",
  "input": {
    "pattern": "class.*Entity",
    "path": "src/modules",
    "glob": "*.ts",
    "output_mode": "content",
    "-i": true
  }
}
required에 pattern만 있으므로 나머지는 선택적이다. Claude는 input_schema의 description을 참고하여 적절한 파라미터를 선택한다.
Model & Config
마지막으로 모델 선택과 각종 설정 옵션들이다:
{
  "model": "claude-opus-4-5-20251101",
  "max_tokens": 32000,
  "thinking": {
    "budget_tokens": 31999,
    "type": "enabled"
  },
  "stream": true,
  "metadata": {
    "user_id": "user_2f2ce5dbb94ac27c8da0d0b28dddf815fc82be54e0..."
  }
}
| 옵션 |
설명 |
model |
사용할 Claude 모델 (claude-opus-4-5, claude-sonnet-4-5 등) |
max_tokens |
최대 출력 토큰 수 |
thinking |
Extended Thinking 설정 (budget_tokens로 사고 토큰 예산 설정) |
stream |
스트리밍 응답 여부 |
metadata |
사용자 ID 등 메타데이터 |
마치며
지금까지 Claude API Request Body의 4가지 핵심 구성 요소를 살펴보았다:
- System Messages: Claude의 역할과 행동 방식을 정의
- Messages: user-assistant 간 대화 기록을 누적하며, tool_use/tool_result를 통해 Tool과 상호작용
- Tools: JSON Schema 기반으로 사용 가능한 도구의 이름, 설명, 입력 파라미터를 정의
- Model & Config: 모델 선택, 토큰 제한, 스트리밍 등 설정
이 구조를 이해하면 Claude API를 더 효과적으로 활용할 수 있다.


![Deux scientifiques devant un ordinateur de la taille d’une maison : « Cette nouvelle IA peut résoudre n’importe quel problème ! » Puis, réfléchissant : « Mmh, quel est le plus gros problème de la planète ? » L’IA répond : « Calcul en cours… » L’ordinateur dégaine pour finir trois mitrailleuses et atomise les scientifiques dans un déluge de feu. [fin]](https://media.oisaur.com/media_attachments/files/116/203/786/775/850/983/original/a22c85f84b7bb5a8.png)


 .dev
.dev


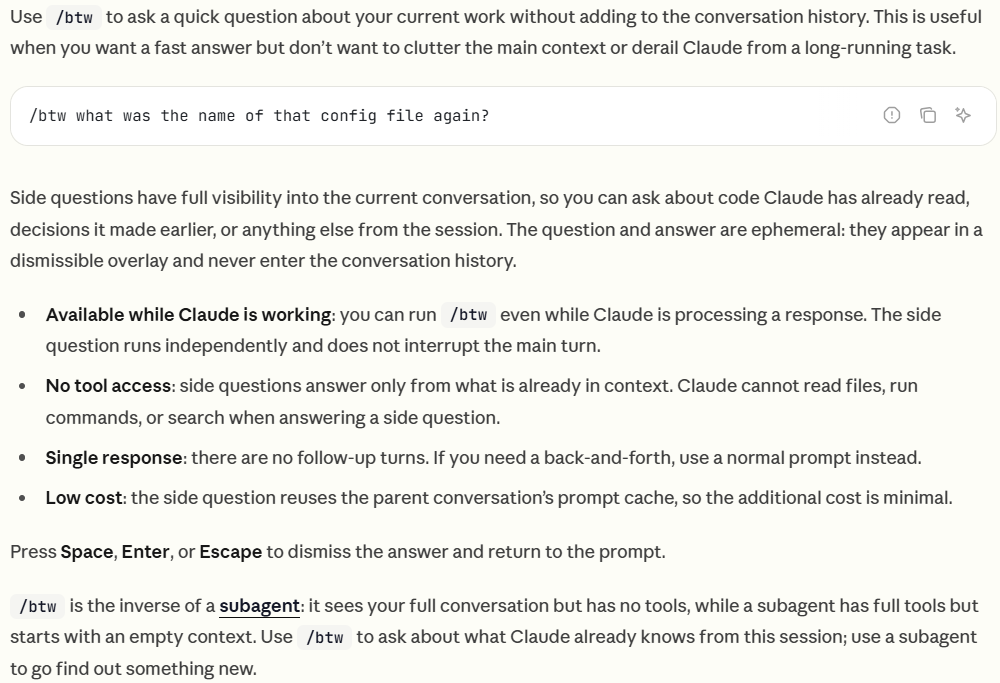
![Claude Code를 실행하면 터미널 화면. 아래와 같은 내용이 나와있다:
Update Todos
- [X] Create directory structure (ko/, en/, shared/)
- [X] Extract common styles to shared/style.typ
- [ ] Move current main.typ to ko/main.typ
- [ ] Create English version in en/main.typ
- [ ] Update flake.nix to build both versions](https://media.hackers.pub/note-media/2e81ad0a-8145-40c8-bb01-ebb2d72c6d07.webp)


 Qiita - 人気の記事